If you’re a Windows 11 user, it’s important to know your computer specs, especially if you’re planning to upgrade or install new software that requires a certain level of hardware capability. Thankfully, Windows 11 makes it easy to check your computer’s specifications with just a few clicks. In this article, we’ll walk you through the steps of how to find computer specs on Windows 11.
How to check computer specs on Windows 11
The easiest way to find computer specs on Windows 11 is by using the Settings app. Here’s how:
1. Click the Start button in the bottom-left corner of your screen.
2. Click the gear icon to open the Settings app.
3. Click on System in the left-hand pane of the Settings window.
4. In the System settings, click on About in the left-hand pane.
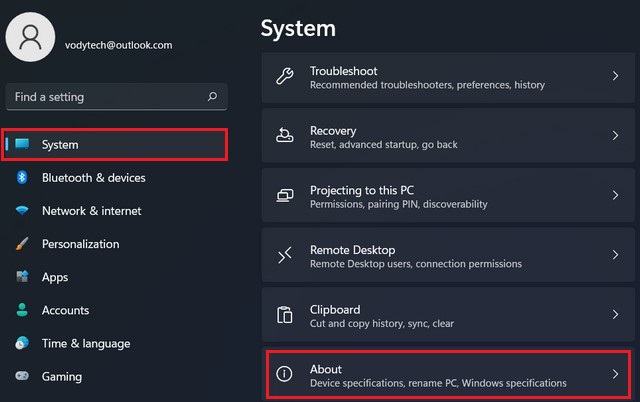
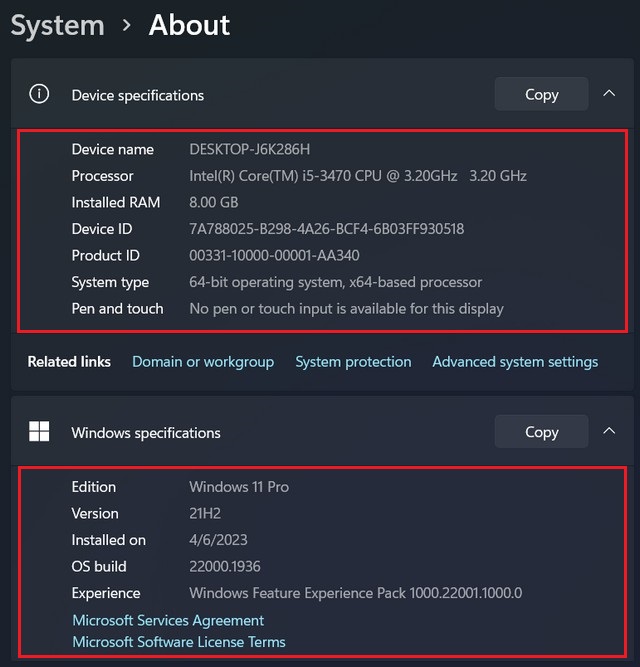
5. On the About page, you’ll see various sections that provide information about your computer, including the device name, processor, installed RAM, device ID, and more. You can also see your Windows specifications, such as the edition, version, and build number.
Check computer specs from System Information
Another way to find your computer’s specs on Windows 11 is by using the System Information tool. Here’s how:
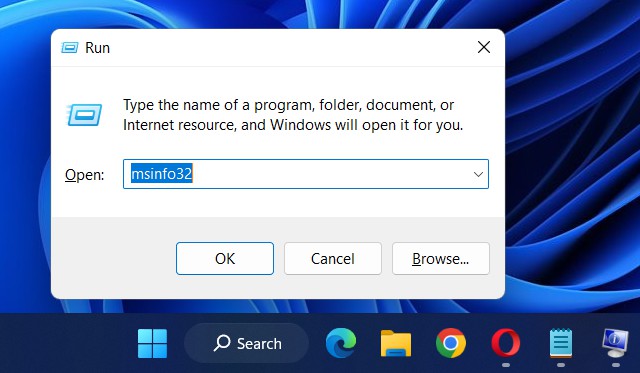
1. Press the Windows key + R on your keyboard to open the Run dialog box.
2. Type msinfo32 into the text field and press Enter.
3. The System Information window will open, displaying a wealth of information about your computer’s hardware and software.
4. To view your computer’s specs, look for the “System Summary” section at the top of the window. Here, you’ll see information about your computer’s processor, installed RAM, and system type.
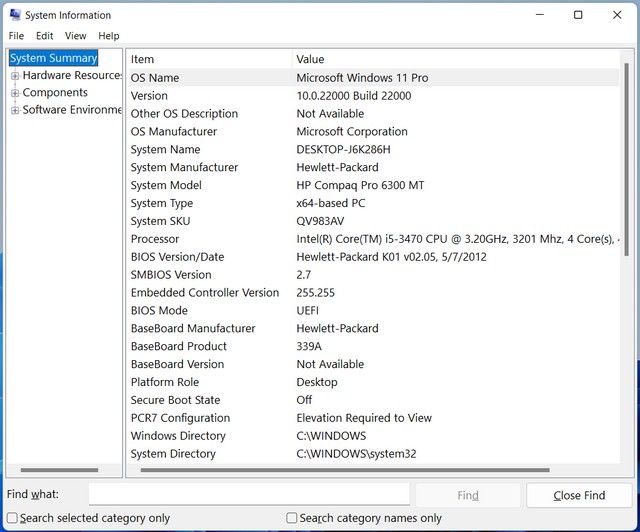
To view more detailed information about your computer’s hardware, expand the “Components” section in the left-hand pane of the System Information window. Here, you can view information about your computer’s display, sound, storage, and more.
Check computer specs from Command Prompt
If you’re comfortable using the Command Prompt, you can also use it to find your computer’s specs on Windows 11. Here’s how:
1. Press the Windows key + R on your keyboard to open the Run dialog box.
2. Type “cmd” into the text field and press Enter.
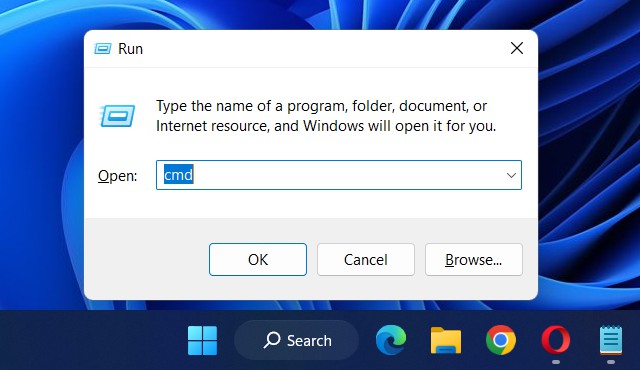
3. In the Command Prompt window, type systeminfo and press Enter.
4. After a few moments, you’ll see a long list of information about your computer’s hardware and software.
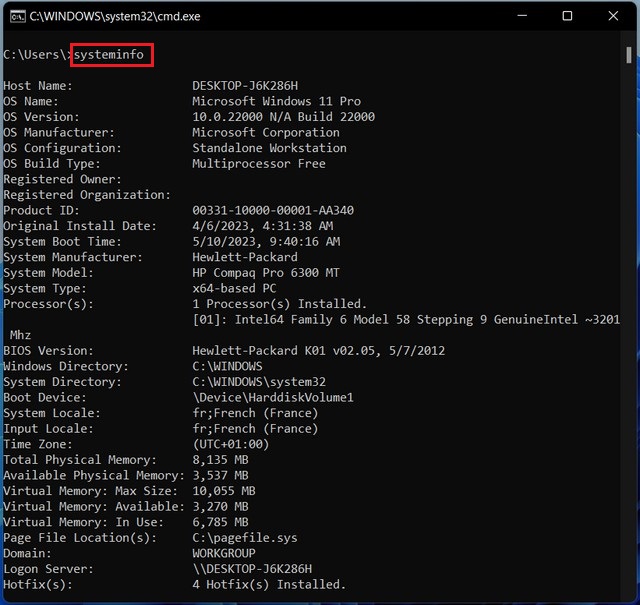
To view specific information, use the scroll bar to navigate through the list or use the “find” command by typing “findstr” followed by a space and the term you’re looking for (e.g. “processor”).
In addition, you can also use third-party software such as CPU-Z or GPU-Z to get more detailed information about your computer’s specs.
Read more: How to Check Graphics Card (GPU) on Windows 11
Finding your computer’s specs on Windows 11 is a simple and straightforward process that can be accomplished using one of these three methods. Whether you prefer using the System Information tool, the Settings app, or the Command Prompt, you’ll be able to quickly and easily access the information you need.


